v-text
vue
<template>
  <h1 v-text="msg"></h1>
  <h1>没有使用v-text: {{ msg }}</h1>
</template>

<script setup>

const msg = "Hello World!"
</script>

<style scoped>

</style>
相当于将变量的内容写在html中

v-html
- v-html 指令类似于 v-text 指令;
- 它与v-text区别在于v-text输出的是纯文本,浏览器不会对其再进行html解析,但v-html会将其当html标签解析后输出。
- v-html 指令应尽量避免使用,否则会带来危险(XSS攻击 跨站脚本攻击),一般只在可信任内容上使用 v-html,永不用在用户提交的内容上;
vue
<template>
  <div v-text="msg"></div>
  <div v-html="msg"></div>


</template>

<script setup>

const msg = "<h1>Hello World</h1>"
</script>

<style scoped>

</style>
v-show
可以使用这个指令让一个元素是否可见
vue
<template>
  <h1 v-show="show">Hello World</h1>
  <button @click="show=!show">点击切换</button>

</template>

<script setup>
import {ref} from "vue";

const show = ref(true)
</script>

<style scoped>

</style>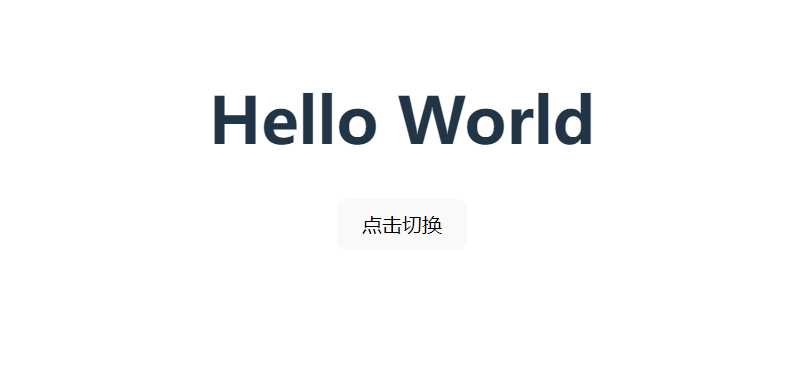
可以点击按钮进行切换,让元素在可见与不可见之间变换
v-if
v-if和v-show非常类似,但是,v-show相当于修改css的display属性,让元素变得不可见,而v-if是直接进行销毁
vue
<template>
  <h1 v-if="isShow">Hello World</h1>
  <button @click="isShow=!isShow">点击切换</button>
</template>

<script setup>
import {ref} from "vue";

const isShow = ref(true)
</script>

<style scoped>

</style>
关于是否销毁这个方面,可以直接使用开发工具,进行查看
v-else
v-else 元素必须紧跟在带 v-if 或者 v-else-if 的元素的后面,否则它将不会被识别。和逻辑语句中的if else一样,需要一套一套的使用
vue
<template>
  <h1 v-if="isShow">True</h1>
  <h1 v-else>False</h1>
  <button @click="isShow=!isShow">点击切换</button>
</template>

<script setup>
import {ref} from "vue";

const isShow = ref(true)
</script>

<style scoped>

</style>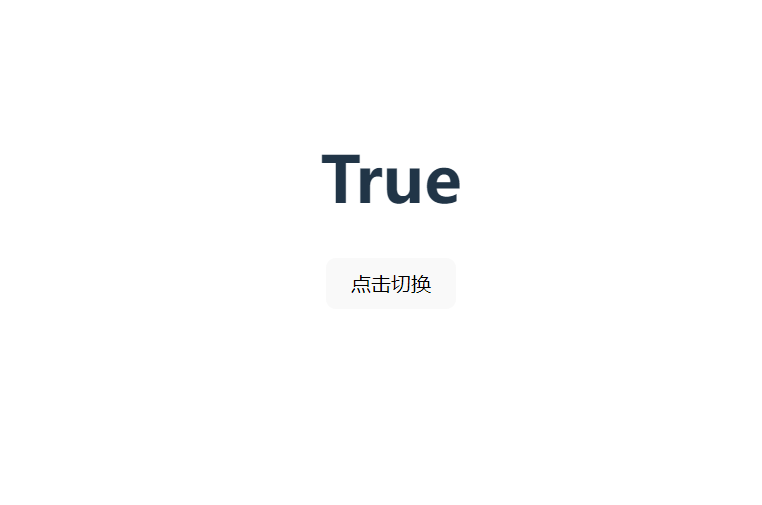
点击切换后,文字将会在True和False之间进行切换
v-else-if
其实和普通编程语言里的if语句差不多
vue
<template>
  <h1 v-if="number>0.75">大于0.75</h1>
  <h1 v-else-if="number>0.5">大于0.5</h1>
  <h1 v-else>小于0.5</h1>
  <button @click="number=Math.random()">点击切换</button>
  <p>{{number}}</p>
</template>

<script setup>
import {ref} from "vue";

const number = ref(1)
</script>

<style scoped>

</style>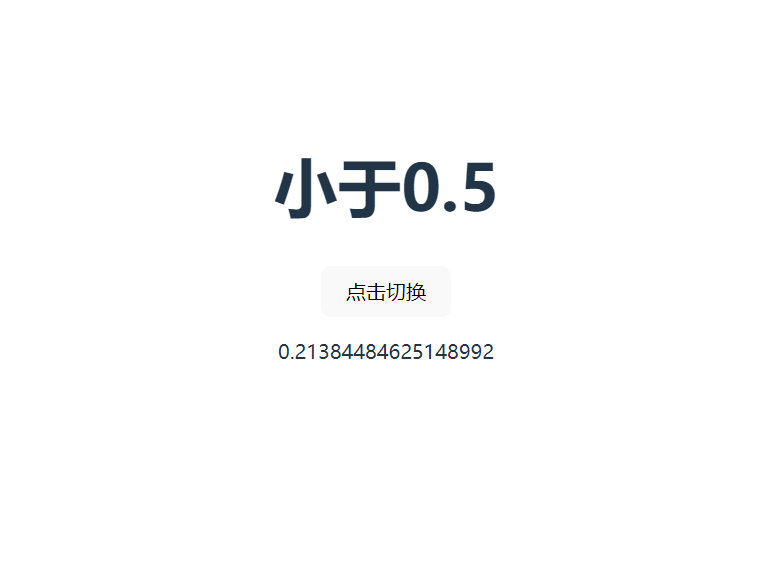
根据数据显示不同的内容
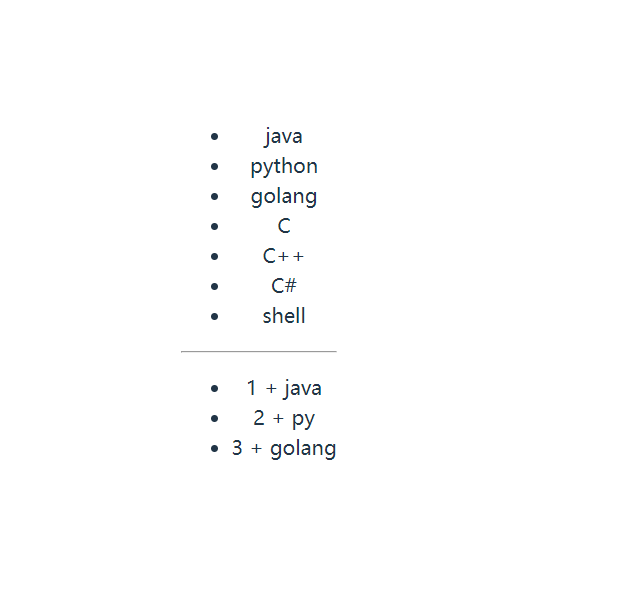
v-for
基于原始数据多次渲染元素或模板块。渲染数组,map中的数据
vue
<template>
  <ul>
    <li v-for="item in list" v-text="item"></li>
  </ul>


  <hr>
  <ul>
    <li v-for="(value,key) in map1" >{{key}} + {{value}}</li>
  </ul>
</template>

<script setup>
const list = ['java','python','golang','C','C++','C#','shell']
const map1 = {
  1:'java',
  2:'py',
  3:'golang'
}
</script>

<style scoped>

</style>
需要注意的是,在进行遍历map时,前面的是value后面的是key
v-on
- 为元素绑定监听事件
v-on:事件名="函数名",简写@事件名='函数名'v-on绑定的事件触发后,vue会去实例对象的methods中找对应的回调函数- 使用修饰符,如
v-on:事件名.once="函数名",表示该动作之执行一次 - 使用
@事件名='函数名($event)'来获取事件对象
vue
<template>
  <p>v-on:
    <button v-on:click="count1++">{{ count1 }}</button>
    <!--绑定click事件-->
  </p>
  <p>缩写@:
    <button @click="count2++">{{ count2 }}</button>
    <!--使用缩写形式绑定click事件-->
  </p>
  <p>once:
    <button @click.once="count3++">{{ count3 }}</button>
    <!--使用修饰符,once表示这个事件只能触发一次-->
  </p>
  <p>
    <button @[event]="count4++">{{ count4 }}</button>
    <!--动态绑定事件,事件为字符串-->
  </p>

</template>

<script setup>
import {ref} from "vue";

const count1 = ref(0)
const count2 = ref(0)
const count3 = ref(0)
const count4 = ref(0)
const event = 'click'
</script>

<style scoped>

</style>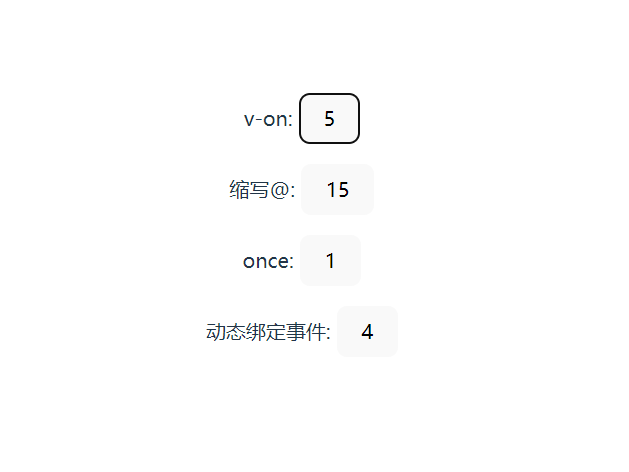
v-bind
v-bind作用:动态绑定属性 除了内容需要动态决定,有些属性我们也希望动态绑定 比如a元素的href属性、img元素的src属性 错误做法
<img src="" alt=""> 属性后面不可以用Mustache语法
vue
<template>
  <p>
    <img v-bind:src="imageSrc" style="width: 200px;height: 200px"/>
  </p>
  <p>
    <img :src="imageSrc" style="width: 200px;height: 200px">
  </p>

  <p>
    <!--动态绑定-->
    <img :[key]="imageSrc" style=" width: 200px;height: 200px">
  </p>
</template>

<script setup>

const imageSrc = "https://cdn.jsdelivr.net/gh/2822132073/image/202303042132603.png"
const key = 'src'
</script>

<style scoped>

</style>
可以对标签的属性进行绑定,比如说id,等这些
v-model
在表单输入元素或组件上创建双向绑定。根据表单输入元素或组件输出的值而变化
修饰符:
vue
<template>
  <p><input type="text" v-model="msg"></p>
  <h1>{{ msg }}</h1>

</template>

<script setup>
import {ref} from "vue";

const msg = ref("Hello Vue3!")

</script>

<style scoped>

</style>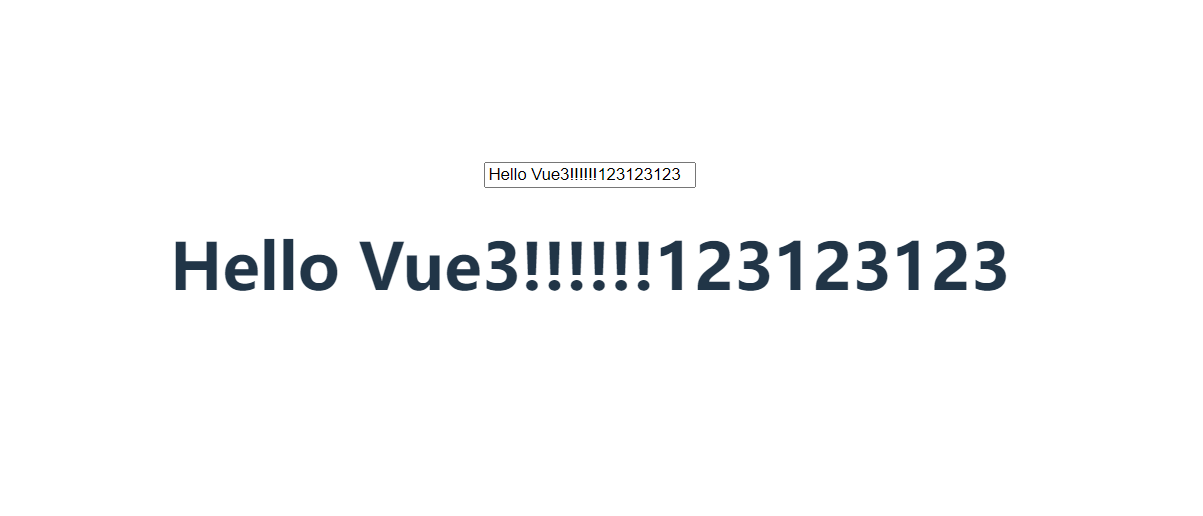
将input的输入框,绑定msg变量